Shell Basics
Please note that the various technologies we are going to present are each controlled via API access. However, the default means of accessing their API are command-line tools, so we will need to be able to handle CLI.
In this chapter we cover some Shell/Bash basics so that you can master our course. If you are a heavy UNIX user maybe here you’ll find only few new information.
Navigate
If you are successfully logged into your VM you should see a similar output on your screen as listed below:
Password: ************
Welcome to Ubuntu 18.04.5 LTS (GNU/Linux 5.4.0-1025-azure x86_64)

 * Documentation:  https://help.ubuntu.com
 * Management:     https://landscape.canonical.com
 * Support:        https://ubuntu.com/advantage

  System information as of Fri Sep 18 11:50:27 CEST 2020

  System load:  0.09               Processes:              155
  Usage of /:   21.6% of 28.90GB   Users logged in:        0
  Memory usage: 10%                IP address for eth0:    10.0.1.4
  Swap usage:   0%                 IP address for docker0: 172.17.0.1

0 packages can be updated.
0 updates are security updates.


Last login: Fri Sep 18 11:30:34 2020 from 52.174.57.222
novatec@ikl-vm-1:~$
Verify that you are logged in as novatec user - try whoami in the shell and execute it with enter.
Tip
When you copy a command, paste it into your shell with right-mouseclick.
Check in which directory tree you are located. Execute pwd and you should see:
novatec@ikl-vm-1:~$ pwd
/home/novatec
pwd is an acronym for print working directory.
Do you want to clear the shell output? Try the clear command.
So we learned that our actual working directory is /home/novatec. But how can we see what files and other directories are located here?
The simple command ls does the trick (it stands for list)! Execute it and you should see that no files are there. But
you can advise ls that you want to really see all there is. Add -a to your ls command separated by a space
and execute. Which directories are there?
Create a new directory mkdir shellbasics. mkdir means make directory followed up by a chosen name.
Nice! You have created your first directory. Please use cd shellbasics for switching to this new working directory.
Do you remember how to display the current working dir?
Imagine you just remembered that you have important things to do tonight. So you better make a note of that in your new working directory.
Execute nano mytodolist.txt.
Then the window should change and you see the nano text-editor. Feel free to create a todolist. Use the cursor arrows of your keyboard to navigate.
Save your text file with Ctrl + s and exit nano with Ctrl + x.
Smart! Do you want to display the content of your todolist? Execute cat mytodolist.txt. The content of your file
should appear in the shell:
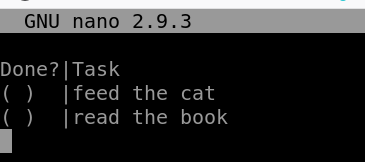
$ cat mytodolist.txt
Done?|Task
( )  |feed the cat
( )  |read the book
For now this should be sufficient for our course. Use plain cd to switch back to your standard home directory, or,
alternatively, go “up” one directory by executing cd .., which will yield the same net result.
Cool Tips
There are some hidden features in your shell:
- E.g you can hit
cursor arrow upon your keyboard to see the latest used commands of your CLI. - If you use
tab keyof your keyboard while you type some commands there is autocompletion for known paths and binaries. - You want to search through your history? Hit
Ctrl + rand type in what you are looking for. Is it there? No? Again useCtrl + rfor continuing the search. - Did you find what you were looking for? Use the
cursor arrow rightbutton and you can modify this command before executing it with theenterbutton. - The font of your CLI is too big/small? You can use
Ctrl + mousewheel down|upto decrease/increase the font size :) - Some commands don’t terminate with a newline, so their output will appear prepended to the normal command prompt,
making it hard to notice. For that reason we sometimes append a
; echoto some commands, in particular when usingcurl, to force drawing a new line before prompting. (Yes,curl --write-out '\n'exists, but that would shift more logic into a specific tool, as opposed to just keep using the genericechofrom the shell.)
Tmux information (Split your CLI Panes for more overview)
If you are able to connect via a plain SSH client directly from your workstation you might want to skip this part, as you can easily open several SSH connection in parallel. However, if you were forced to make use of Guacamole , or if you are just feeling adventurous, you might want to use tmux to split your single terminal session into separate sub-windows as follows.
We installed tmux in your VM. Please have a look at this guide if you don’t know tmux.
The configuration is based on this project , and at xpanes there is some good information about the tmux settings.
Open the panes by executing xpanes -l mv -d 1 2 3 in your shell.
You can also exit tmux by typing exit in your shell.
To navigate trough the panes use Ctrl + b and arrow key left/right or up/down. If you use the GUI you can switch on
the mouse-mode in tmux with Ctrl + m. If ever needed you can force a redraw of tmux’ screen via Ctrl + l, e.g. when
you have fragments of past output in your panes.
But beware: when using tmux you have to paste with the status bar or Ctrl + Shift + v instead of with a right-click in
your terminal.